When I first started this blog, I was an unemployed costumer attempting to create period gowns and costumes with very limited means. Although now employed, I still try to be as thrifty as possible. I am still "The Broke Costumer"!

In addition to posts about the outfits I make on a budget, this blog includes short research articles on fashion, history, accessories, styles, or whatever interests me at the moment.


I hope you enjoy my journey into the land of inexpensive costuming and short articles.


Tuesday, November 29, 2011

Peppermint Delight

I had some requests to post about this costume. Almost two years ago, a dear friend was cleaning out her stash, and I bought the sweetest little red and white stripe cotton from her for $2 a yard. I knew I wanted to make a polonaise out of it, but it sat in my closet for a year and a half. I finally had the occasion to make it. I was attending Costume College at the end of July, and there was an ice cream social planned for Friday night. The fabric reminded me of the Carnation Ice Cream plaza at Disneyland. I ordered some artificial cherries on Ebay, and made a cherry pin for the front closing of the dress, and put some on my hat along with a few carnations. The hat was originally from my Steampunk Bride outfit.
 
I used my favorite patterns again -Truly Victorian.    TV410 - 1873 Polonaise and for the skirt, TV201 - 1870s Underskirt.

For the skirt, I visited Robert’s on one of my visits to the Los Angeles  fabric district. He sells 100% cotton and cotton blend fabrics. I had become friends with him after I was asked to make eight outfits in white for my friend’s theater production of Ragtime. He gave me a great price on the 30+ yards of eyelets and cottons Ipurchased from him, so every time I go in now, he always gives me a deal.


For the trim on the skirt and sleeves, I used some white beading I had in my stash, and for 33cents a roll at Michaels, I got some red ribbon to thread through it.


The trim on the polonaise is a cute little ball fringe. I bought 8 red buttons for around $2 for the front, Add in a couple of scrap red ribbon bows at the elbows, and a scrap piece of red for a bow at the waist, and that is all for decoration! 


BUSTLING THE BACK
I have been bustling my gowns the same way for the last few years. Its quite easy! From the inside of the waist, tack a ribbon approximately 18 inches long at the center waistband. On either side near the side seams, tack two more ribbons at the waist. Starting on the middle ribbon, pinch up two or three places on the inside of the fabric and safety pin to the ribbon. On the two side ribbons, do the same, but be sure to offset the pinches, so you don’t have the three ribbons pinned in the same places. Here is a picture of the polonaise inside out so you can see.

No need to sew the dress to the ribbon. Leave the safety pins in, you won’t see them from the outside because the poof covers up any pin that shows. Now you can adjust your poofs whenever you want!


I was honored to be featured on the cover of Squeals, the Costume Guild West monthly magazine.


Last weekend, I attended the Steampunk Christmas walkabout at the Del Mar Antique Show. I simply switched out the cherries for poinsettias and candy canes, and I was all set!
 
Santa, me and Arctic Nymph (April)
With Val LaBore as the Ghost of Past, Present and Future

Our backsides - Marcee, me and April
Cost
Fabric - $8.50 (4 1/4 yds)
Bodice lining - stash
Buttons - $2
Bustle Ribbon - $1
Beading - $3
Red Ribbon - 33 cents
Skirt eyelet - $12 (6 yds)
Ball Fringe - $8 (4 yds)
TOTAL $35.00

Special Candy Cane for Walkabout:  $1!


Monday, November 28, 2011

The Loose Change Project

While I am finishing up my Victorian bodice, here is a quick post of what is in my future plans.  I have had my eye on this dress for many months now.   I will be using my Truly Victorian pattern again, the Trained Skirt Ensemble.  However, this time I will make view B.  For the bodice, I may use my 1870 Day Bodice pattern.


Again, funding is the problem.  I think Val is my fabric fairy Godmother.  I showed her this picture, and not long after, she gave me a sample of some pink faux silk taffeta she had in her stash.   It looks like this:  I think its pretty darn close!

Val said  I could buy it from her, and  the cost is $7 per yard.  There are 9 1/3rd yards on the bolt.  She was kind enough to say she would hold it while I make payments on it.  The first payment will be this week.   I have been saving all my loose change in a jar, and when it gets a few inches deep, I take it to the Coin Star machine and cash it in.  That is how I was able to make the first payment!  I have probably two more months to go til its paid for, then its officially mine!    I will be digging in old purses, between the couch cushions, etc.  I cannot believe how much loose change adds up.  I might even sneak a look in Jerry's pants pockets when I do the laundry.

Saturday, November 26, 2011

An 1880 Natural Form Seafoam Green Victorian Skirt and Bodice - Part 1

I love to make Victorian gowns.  I really wanted to make a luxurious silk dupioni gown with special beaded trims. Did I have a couple hundred dollars? No. I could only spend about $50 to do the whole thing, and this amount had to be spread over two or three months. This is how I did it.
 
I chose Truly Victorian patterns from the Natural Form period (1877-1882). The skirt is TV225 (1878 Fantail Skirt) and the bodice is TV422 (1881 Dinner Bodice).

On a shopping trip to downtown Los Angeles’ fabric district, I found some beautiful silk dupioni for about $12-$14 a yard. Not gonna happen. I needed about 8 yards, which more than doubled my entire budget for the whole project. Then I found some pretty sea foam green polyester dupioni at LA Alex, and it was only $4 a yard! It has a similar, slubby look like real silk.

Down the street is Target Trim, a gigantic warehouse literally stacked to the ceiling with every trim imaginable. I found a beautiful aqua beaded trim on black sheer ribbon for only $1.50 a yard. I just needed it for around the neckline and wrists, so I got 2 yards.

For around the bottom of the trained skirt I wanted two rows of black lace. In Trim Expo I found a pretty vintage floral style, 3 inch wide lace for only $1 a yard. I bought 8 yards. It was quite plain next to the beaded trim I bought for around the neckline, so I bought a pack of beads at Michaels with a 50% off coupon. My friend and I were watching a movie, and we each started on one end, sewing a bead in the center of each flower. By the end of the movie we met in the middle, and the beading was complete!
 
SKIRT
Cutting out the skirt proved to be very trying. I have never had a problem with Truly Victorian patterns, until now. The skirt itself was simple to make, but most of the pattern pieces were mis-marked! First, they were all titled "Underskirt" which it isn’t. There were two different-shaped pieces marked "B - Side - Cut 2". After cutting out both pieces, I discovered that one was actually supposed to be marked "Front, Cut one on Fold". I was very glad I had enough fabric to squeeze out a new front piece! 


Once I figured out the correct names for the pattern pieces, it went together like a dream. To make the fantail, there is a cord that runs through double fold bias tape sewn inside the skirt, near the back of the knees. I used a bit of left over bias tape (in lime green, but who sees it) and inserted a piece of cording. Pull tight and down to about 10 inches across and tie the cord. Makes the train fan out beautifully!

I used some polyester horsehair braiding in the hem which sure made a difference. Makes the hem stand on its own better, so it doesn’t collapse inward.


Next, I went around the bottom twice with the black 3 inch trim. This also made the hem stand out by giving it visual weight. Here is the trim  that is going on the hem.


PETTICOAT
Since the skirt fabric was very lightweight, I made a petticoat from the same pattern. I didn't have another $15 to make one, so I went down the street to the thrift store. I bought a full size white sheet for $3. I folded it like fabric yardage and laid the pattern pieces out. There was plenty of fabric, and its perfect for an underskirt! I ironed that ole wrinkly sheet and cut the pieces out.


Helpful tip: Canned veggies that sit in the back of your cupboard for a year (especially lima beans) make the best pattern weights, along with a curious cat.


I made the petticoat an inch shorter than the skirt so it won’t show. The good thing about this petticoat is I can use it for other trained skirts. If the skirt is fuller, I just let out the cord! Speaking of the cord, I didn't have any white bias tape, but I had a white ribbon. I used this and it worked just fine.

Well, here is the finished petticoat and skirt, which was started Friday afternoon and completed Saturday evening. In part 2, I will be making the bodice.


Friday, November 25, 2011

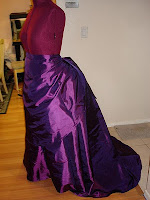
My First Victorian Dress. 1872 Purple Early Bustle Gown.

Since joining the San Diego Costume Guild, I have had the opportunity to be in a few fashion shows. I really had nothing to wear, and actually had to borrow two outfits from my friend Val to wear in the Daughters of the American Revolution fashion show. Suddenly I was in charge of the fashion show at San Diego’s Gaslight Gathering Steampunk and Victoriana Convention. I just had to have a gown for this, as I was the MC and would be up in front of the entire room.

I decided to do an early bustle era gown using Truly Victorian patterns. I used TV208 - 1870 Trained Skirt Ensemble and TV405-1872 Vest Basque.


This would require approximately 14 yards of fabric, which included extra for the pleating I had in mind. I had to find something around $4 a yard, as my budget was approximately $75 for the entire thing. I had to purchase my supplies over a three month period as I was on a strict budget, having just been laid off.
 
Val needed to go to the Los Angeles fabric district, so I tagged along. I knew I wanted a deep eggplant color. After several stores and no luck, Val took me to her favorite store, Valentines.

I found the color I wanted, but the fabric was too expensive. Then I found the same color in a poly blend. He wanted $7 a yard for it.

Helpful hint: When shopping in the fabric district, bargain! The more yardage you buy, the cheaper it is by the yard. Do not accept the first price they tell you. Tell them its over your budget and start to walk away. They will follow you to the door, and offer you a reduced price if you buy from their store.

 By bargaining for a better price, I got it for $4 a yard!


I began in early February 2011. I wanted several rows of pleating around the bottom of the dress as well as the apron, with some sort of black trim in between the rows. I made the base skirt and apron. Again, Val to the rescue. She let me borrow her bustle petticoat so I could get the correct shape.  As you can see from the early stages the apron is too long for what I wanted to do.  I ended up shortening it quite a bit by the time I was finished.


Next, I had to make the pleats. I did all the pleats by hand, turning them on fork tines, pressing, pinning. It took many, many nights in front of the television to do this. I ended up pleating a 45 yard long strip! Phew! Then I started attaching the strips to the skirt.

In between the pleats I wanted to put a freeform black trim. I decided to make loose box pleats with black ribbon. Beverly’s Fabrics sells ribbon on spools by the yard for 33 cents a yard. I got approximately 50 yards of ribbon for this project.


The bodice followed. Luckily I have tons of scrap fabric collected over the years and I am able to use this for linings and interlinings. A bit of faux moiree for the vest portion, self pleating and more black ribbon trim completed the look. I modified the bodice pattern by not adding the collar and cuffs, and I shortened the back tail.

I could not afford to buy boning as my funds were completely gone. Easy (totally un-period) fix? Zip ties! They are long enough for bodice seams, and easily trimmed. You can find them in different widths. I actually whipstitched two together side by side, then inserted into double fold bias tape, which was then stitched to the bodice seams.

Here are a few photos of the completed gown. It won’t pass the historical test, but its fine for the events I attend.
 
Wild Wild West Con
Cost:
14 yards of fabric: $56
buttons: $4
bodice lining: stash scraps
black vest insert: stash scrap
zip ties: $1 a package
50 yards black ribbon: $18
TOTAL: $79


Escondido Women's Club
Fashion Show